Jumbo Frame Settings & Slow or Failing Live Migrations over SMB Direct

The Problem

I recently had to trouble shoot a Windows Server 2012 R2 Hyper-V cluster where SMB Direct is leveraged for live migration. It seemed to work, sometime perfectly but at times it but it was in “slow” motion. The VMs got queued for live migration, it took some time for it started and sometimes it would finish or it would fail. This did not happen between all the nodes. I diligently checked out the SMB Direct network but that was OK on all nodes. Basically the LM network was perfectly fine.

To me this indicated that the hosts potentially had issues communicating with each other to coordinate the live migration. But pings and such looked good, there was connectivity, on the surface all seemed well.  In the event log details we saw indications that this was indeed the case. Unfortunately I did not get the opportunity to take screenshots or copies of the events in this particular situation.

The nodes had a separate 2*1Gbps native team LAN access and backups. But diving deeper I noticed that they had set Jumbo Frames on some of those member NICs and not on others. So these setting differed from node to node and that was leading to the symptoms we described above.

Conclusion

You can use Jumbo Frames on your live migration network. Testing has shown this to be beneficial. When you’re doing SMB direct it won’t make such a big difference but it doen not hurt. When SMB Direct fails you’ll fall back to SMB with Multichannel and there it helps more! See Live Migration Can Benefit From Jumbo Frames. While SMB Direct (infiniband, RoCE & iWarp) know Jumbo frames the limited testing I have ever done there indicates only a small increase (2%) in throughput so I’m not sure it’s even worthwhile when doing RDMA.

When you can use Jumbo Frames on you host LAN NIC or team of NICs (handy is you use it to do backups as well)  you need to be consistent end to end. Meaning ALL hosts, ALL NICS & all switches/ switch ports. Being inconsistent in this on the cluster nodes  was what cause the slow to failing live migrations. You need to have good communications between the hosts themselves and AD. Just unplug the LAN from a Hyper-V cluster host to demo this => live migration from to that node and the rest of the cluster won’t work. Mismatching Jumbo Frames or potentially other network settings make this less obvious.  Another “fun” example to trouble shoot is a NIC team where the member NICs are in different VLANs.

Hyper-V Cluster Node Pause & Drain fails – Live Migrations fail with “The requested operation cannot be completed because a resource has locked status”

One night I was doing some maintenance on a Hyper-V cluster and I wanted to Pause and drain one of the nodes that was up next for some tender loving care. But I was greeted by some messages:

image

[Window Title]
Resource Status

[Main Instruction]
The requested operation cannot be completed because a resource has locked status.

[Content]
The requested operation cannot be completed because a resource has locked status.

[OK]

Strange, the cluster is up and running, none of the other nodes had issues and operational wise all VMs are happy as can be. So what’s up? Not to much in the error logs except for this one related to a backup. Aha …We fire up disk part and see some extra LUNs mounted + using “vssadmin list writers“ we find:

clip_image002


Writer name: ‘Microsoft Hyper-V VSS Writer’
…Writer Id: {66841cd4-6ded-4f4b-8f17-fd23f8ddc3de}
…Writer Instance Id: {2fa6f9ba-b613-4740-9bf3-e01eb4320a01}
…State: [5] Waiting for completion
…Last error: Unexpected error

Bingo! Hello old “friend”, I know you! The Microsoft Hyper-V VSS Writer goes into an error state during the making of hardware snapshots of the LUNs due to almost or completely full partitions inside the virtual machines. Take a look at this blog post on what causes this and how to fix fit. As a result we can’t do live migrations anymore or Pause/Drain the node on which the hardware snapshots are being taken.

And yes, after fixing the disk space issue on the VM (a SDT who’s pumped the VM disks 99.999% full) the Hyper-V VSS writer get’s out of the error state and the hardware provider can do it’s thing. After the snapshots had completed everything was fine and I could continue with my maintenance.

Logging Cluster Aware Updating Hotfix Plug-in Installations To A File Share

As an early adopter of Windows Server 2012 it’s not about being the fist it’s about using the great new features. When you leverage the Cluster Aware Updating (CAU) Plug-in to deploy hardware vendor updates like those from DELL which are called DUPs (Dell Update Packages) you have the option to to log the process via parameter /L

This looks like this in the config XML file for the CAU (I’ll address this XML file in more details later).

<Folder name="Optiplex980DUPS" alwaysReboot="false"> 
    <Template path="$update$" parameters="/S /L=\zuluCAULoggingCAULog.log"/>


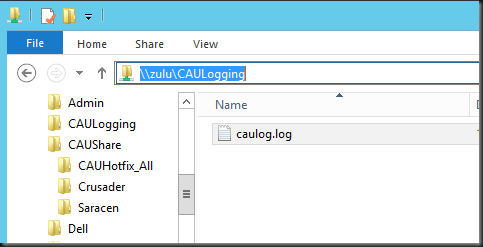
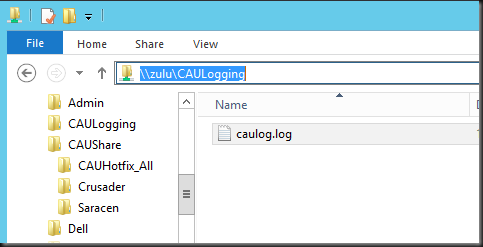
As you can see I use a file share as I don’t want to log locally because this would mean I’d have to collect the logs on all nodes of a cluster.   Now if you log to  file share you need to do two things that we’ll discuss below.

1. Set up a share where you can write the log or logs to

Please note that you cannot and should not use the CAU file share for this. First off all only a few accounts are allows to have write permissions to the CAU file share. This is documented in How CAU Plug-ins Work

Only certain security principals are permitted (but are not required) to have Write or Modify permission. The allowed principals are the local Administrators group, SYSTEM, CREATOR OWNER, and TrustedInstaller. Other accounts or groups are not permitted to have Write or Modify permission on the hotfix root folder.

This makes sense. SMB Signing and Encryption are used to protect tampering with the files in transit and to make sure you talk to the one an only real CAU file share. To protect the actual content of that share you need to make sure now one but some trusted accounts and a select group of trusted administrators can add installers to the share. If not you might be installing malicious content to your cluster nodes without you ever realizing. Perhaps some auditing on that folder structure might be a good idea?

image_thumb61

This means that you need a separate file share so you can add modify or at least write permissions to the necessary accounts on the folder. Which brings us to the second thing you need to do.

2. Set up Write or Modify permissions on the log share

You’ll need to set up Write or Modify permissions on the log share for all cluster node computer accounts. To make this work more practically with larger clusters please you can add the computer accounts to an AD group, which makes for easier administration).

image_thumb61

The two nodes here have permissions to write to the location

image

As you can see the first node to create the loge file is the owner:

image

Some extra tips

The log can grow quite large if used a lot. Keep an eye on it so avoid space issues or so it doesn’t get too big to handle and be useful. And for clarities sake you might get a different log per cluster or even folder type. You can customize to your needs.

Cluster Aware Updating – Cluster CNO Name 15 Characters (NETBIOS name length) GUI Issue

There seems to be a small bug in the Cluster Aware Updating GUI when the cluster name exceeds 15 characters. In our example we’ll look at a cluster with the name XXXCLUSSQLSERVERS or xxxclussqlservers.test.lab. We’ll try to connect to that cluster to do some cluster aware updating.

Click on the dropdown arrow and select our cluster

image


Once selected, click “Connect”

image


Now we’re greeted by this little message

image

No, you didn’t make a typo as you selected the cluster from the drop down list. You also know that your cluster is up and running. So what happened? Well, the GUI queries AD and returns the CNOs it finds. Those are limited to the NETBIOS name and as such maximal 15 characters long. In this case the name is XXXCLUSSQLSERVERS and this gives a CNO of XXXCLUSSQLSERVE, which is not found as a cluster.

The fix is easy and simple. Just type in the cluster name. XXXCLUSSQLSERVERS and voila. You can connect and are on your way.

image

Let’s see if the FQDN is accepted as well, shall we? And yes, the below screenshot proves this.

https://blog.workinghardinit.work/wp-content/uploads/2012/12/image43.png

Conclusion

So this is not a problem once you know this Smile. The CAU GUI returns the cluster CNO name and that’s the NetBIOS name which can be only 15 characters long. Selecting it in CUA to connect to the cluster doesn’t work. You need to fill out the complete name. As we demonstrated the CAU GUI does also accept a FQDN. To prevent running into this issue consider not making your cluster names longer than 15 characters as then the CNO and the cluster name will be identical and is a smart thing to do as you’ll avoid possible duplicate CNOs trying (and failing) to be created or other bugs Winking smile.

In PowerShell you always submit the cluster name so you don’t hit this issue. Perhaps the GUI drop down list could translate the CNOs into the actual cluster names?